Why are the lower leaves on my tomato plants turning yellow? I’ve been growing tomatoes for years and don’t remember my tomatoes ever doing this.
Yvonne T.
Hi Yvonne, Given the current warm weather and recent May-June rains, its possible the yellowing could be a result of overly saturated soil.
That said, its not uncommon for the lower leaves of tomato plants to naturally yellow as plant resources are directed toward new growth.
In a more typical, less rainy spring, yellowing lower leaves on your tomato plants could be due to several common issues.
Possible Causes
Natural Aging:
Reason: Lower leaves naturally yellow and drop as the plant matures, redirecting energy to fruit production. This is normal, especially mid-season (June).
Check: If only the oldest, bottom leaves are affected and the plant looks healthy otherwise (green upper leaves, fruit setting), it’s likely not a problem.
Action: Trim yellow leaves with clean shears to improve airflow, but don’t overdo it—remove no more than 1/3 of foliage.
Watering Issues:
Overwatering: Excess moisture from recent rains or overzealous watering can cause root rot, leading to yellowing. Tomatoes prefer consistent moisture but dislike soggy soil.
Underwatering: Dry spells between rains can stress plants, causing lower leaves to yellow first.
Check: Soil should be moist 1–2 inches deep but not waterlogged. Test by sticking a finger in—if it’s soggy or bone-dry, adjust.
Action: Water 1–2 inches per week if rain is insufficient, ensuring good drainage (e.g., raised bed edges). Mulch with straw or black mulch to retain moisture.
Nutrient Deficiency:
Nitrogen: Lack of nitrogen causes yellowing, starting at lower leaves, as it’s pulled upward for new growth.
Check: Pale yellow leaves with stunted growth suggest nitrogen deficiency. Soil test kits (available at Garden Factory) can confirm.
Action: Apply a balanced fertilizer (e.g., 10-10-10) or compost. Avoid over-fertilizing, which can burn roots.
Disease:
Early Blight: Common in humid climates like Webster, this fungal issue (Alternaria solani) causes yellowing with brown spots and concentric rings on lower leaves.
Fusarium or Verticillium Wilt: These fungal diseases block water uptake, yellowing leaves and wilting stems. Look for wilting despite moist soil.
Check: Inspect for spots or wilting. Early blight thrives in wet foliage; wilts show vascular browning if stems are cut.
Action: Remove affected leaves (bag and discard, don’t compost). Use fungicide (e.g., copper-based) if severe, and space plants 2–3 ft apart for airflow. Rotate crops next year.
Pests:
Aphids or Whiteflies: These can suck sap, weakening leaves and causing yellowing.
Check: Look under leaves for tiny bugs or sticky residue.
Action: Spray with neem oil or insecticidal soap. Encourage ladybugs or lacewings.
Here in Webster
Weather: Recent rains may have oversaturated soil, especially if drainage is poor. Check your bed’s slope or add organic matter to improve it.
Soil: Webster’s clay-heavy soil can retain too much water, exacerbating root issues. Mixing in sand or compost could help.
Next Steps
Prioritize: Start with watering and aging checks—most likely culprits. If persistent, inspect for disease or pests.
Monitor: Yellowing should stabilize with proper care. If it spreads upward or includes wilting, suspect disease.
Prevention: Stake plants to lift foliage, reducing soil contact and disease risk.
Growing tomatoes in Webster, NY (Zone 6a) requires attention to climate, soil, and timing! Tomatoes thrive in warm weather, with at least 6–8 hours of sun, well-drained soil, and consistent care. Here are our suggestions to maximize your harvest.
1. Timing and Starting
Start Date: Mid-May is ideal for planting tomatoes in Webster. The last frost is typically early May (around May 5–10), and soil temperatures should be above 60°F (check with a soil thermometer). Nighttime temps should consistently be above 50°F, which they likely are by May 15.
Transplants vs. Seeds: In May, use transplants (4–6-week-old seedlings) for a faster harvest. If you haven’t started your seeds, by May its too late in the season (they’re better started indoors in March). Buy healthy, stocky plants (6–10 inches tall) from a local nursery. Look for varieties suited to Zone 6a.
2. Choosing Varieties
Determinate vs. Indeterminate: Determinate tomato plants grow to a fixed size, they resemble more a bush than a vine and produce most of their fruit over a short period of time. They are preferred for canning and small spaces. Indeterminate tomato plants grow continuously and producing fruit all season. They resemble vines and requiring significant support. They are great for fresh eating throughout the summer.
For a small space, try 1–2 indeterminate plants (like Sungold for snacking) and 1 determinate (like Early Girl for a quick harvest).
Location: Pick a sunny spot with 6–8 hours of direct sun.
Soil:
Type: Tomatoes need well-drained, loamy soil with pH 6.0–6.8 (test with a kit; adjust with lime to raise pH or sulfur to lower).
Amendments: Mix in 2–3 inches of compost or aged manure to boost fertility. Webster’s clay-heavy soil benefits from adding perlite or sand for drainage.
Spacing: Plant your tomato plants 2–3 ft apart (e.g., 2 ft for Sungold, 3 ft for Big Beef) to allow air circulation and reduce disease.
4. Planting
Depth: Dig a deep hole or trench (8–10 inches). Strip lower leaves and plant so only the top 2–4 inches of the stem are above ground—roots will form along the buried stem, making the plant sturdier.
Support: Install stakes, cages, or trellises at planting time (avoid damaging roots later). Indeterminate varieties like Sungold need a 5–6 ft stake or cage. Determinate ones like Early Girl can use a 4 ft cage.
Companion Planting: Tomatoes pair well with marigolds (repel pests) or basil (improves flavor, deters insects). Plant these nearby but avoid overcrowding.
5. Care and Maintenance
Watering: Water deeply (1–2 inches per week) at the base, not overhead, to prevent fungal diseases like blight. Keep soil consistently moist but not soggy. Mulch with 2 inches of straw or shredded bark to retain moisture and keep soil temperature stable.
Fertilizing:
At planting: Add a balanced fertilizer (e.g., 10-10-10) or compost tea.
During growth: Side-dress with a high-phosphorus fertilizer (e.g., 5-10-10) when flowers form, then every 3–4 weeks. Avoid high-nitrogen fertilizers after flowering—they promote leaves over fruit.
Pruning: For indeterminate varieties, pinch off suckers (small shoots between the main stem and branches) to focus energy on fruit. Leave determinate varieties unpruned.
Pest/Disease:
Common pests in Webster: Aphids, hornworms. Hand-pick hornworms; use insecticidal soap for aphids.
Diseases: Early blight (brown spots on leaves) is common in humid summers. Use drip irrigation, ensure good air circulation, and apply a copper-based fungicide if needed.
Deer: If deer are an issue, use netting or plant deer-repellent marigolds nearby.
6. Harvest and Timing
When: Harvest starts ~60–80 days from planting (mid-July to early August for Early Girl, late August for Big Beef). Pick when fruits are fully colored and slightly soft to the touch.
Frost Protection: First frost in Webster is ~October 5–15. Cover plants with row covers or bring potted tomatoes indoors if frost threatens before harvest is done.
Yield: Expect 5–10 lbs per plant for determinate varieties, 10–15 lbs for indeterminate, depending on care and weather.
Growing Tomatoes in Webster
Weather: July–August can hit 85°F with humidity. Mulch heavily and water in the morning to prevent leaf scorch.
Nurseries: Most garden centers have tomato transplants in the spring. Many also sell cages and organic fertilizers.
Community: Cornell Cooperative Extension of Monroe County offers free tomato-growing workshops—check their website or call (585-461-1000).
Timeline
May 13–15: Buy transplants, prep soil, plant, install supports.
With their stunning and long lasting blooms, Dahlias are a stunning addition to any garden. The middle of May is prime planting time for dahlias, as the last frost has passed (typically early May in Webster), and soil temperatures are above 60°F—perfect for these tender perennials.
1. Planting
Timing: Plant now (mid-May) to ensure blooms by late summer (July–September). Dahlias need warm soil (60°F+), and nighttime temps should stay above 50°F, which they are in Webster this time of year.
Starting: Use tubers (not seeds) for faster results. Look for firm tubers with visible “eyes” (growth points).
Soil: Dahlias need well-drained, loamy soil (pH 6.5–7.0). Webster’s clay-heavy soil benefits from mixing in compost and sand or perlite. Dig a hole 6–8 inches deep, lay the tuber horizontally with the eye facing up, and cover with 2 inches of soil. As the sprout grows, gradually fill the hole.
Spacing: Space tubers 1–2 ft apart (1 ft for dwarfs, 2 ft for larger varieties). Plant 1–2 tubers to avoid overcrowding.
2. Watering and Feeding
Watering: Keep soil consistently moist but not soggy—about 1 inch per week. Water at the base to avoid wetting leaves, reducing powdery mildew risk (common in Webster’s humid summers). Once established, dahlias are somewhat drought-tolerant but don’t let them dry out completely.
Mulching: Add 2 inches of straw or shredded bark mulch to retain moisture and keep soil cool. Keep mulch away from stems to prevent rot.
Fertilizing:
At planting: Mix in a low-nitrogen fertilizer (e.g., 5-10-10) to promote blooms over foliage.
Monthly: Side-dress with a balanced fertilizer (e.g., 10-10-10) or compost tea until blooming starts (July). Too much nitrogen causes leafy growth at the expense of flowers.
3. Support and Pruning
Staking: Most dahlias (except dwarfs) need support, as stems can snap in summer storms. Install a 4–6 ft stake or cage at planting time. Tie stems loosely with garden twine as they grow.
Pinching: When plants reach 12–18 inches tall (around June), pinch the top growth above the fourth set of leaves. This encourages bushier growth and more blooms.
Deadheading: Remove spent flowers weekly to promote continuous blooming through September. Cut back to the nearest set of leaves.
4. Pest and Disease Management
Slugs: Slugs love tender dahlia shoots. Use your grapefruit traps near dahlias, and add a ring of diatomaceous earth around the base. Hand-pick at dusk if needed.
Other Pests: Watch for aphids (spray with insecticidal soap) and spider mites (increase humidity, use neem oil). Japanese beetles may appear in July—hand-pick or use row covers.
Diseases: Powdery mildew thrives in humid conditions. Ensure good air circulation (don’t overcrowd), and apply a sulfur-based fungicide if needed. Avoid overhead watering.
5. Overwintering in Webster
Frost Timing: Dahlias are tender and won’t survive Webster’s winter (lows to -10°F). First frost hits ~October 5–15.
Digging Tubers: After frost blackens foliage, cut stems to 4 inches, dig up tubers, and brush off soil (don’t wash). Dry them for 1–2 days in a garage or shed.
Storage: Store tubers in a box with peat moss, vermiculite, or sawdust at 40–50°F (e.g., a cool basement). Check monthly for rot; mist lightly if they shrivel. Replant next May.
6. Local Tips
Weather: May is rainy (3–4 inches average). Ensure good drainage to prevent tuber rot. July–August heat (80–85°F) will boost growth if you keep soil moist.
Community: Cornell Cooperative Extension of Monroe County (585-461-1000) can provide soil testing to optimize your dahlia bed.
Before you pop those seeds in a pot, you might check and see if your seeds need a bit of a chill first.
As unpleasant as those cold winter nights can be, they provide many seeds with the signals they need to begin the germination process.
Cold stratification is done to imitate the moist, chilly winter weather that triggers a seed to sprout. Most perennial plant seeds require a combination of cold and damp to germinate.
Common varieties that require cold stratification for spring planting: (Varieties in bold are native to Central and Western, New York.)
Agrimony (Agrimonia@) – 30-60 days
Angelica (Angelica atropurpurea) – dry stratify#
Apple (Malus domestica) – 90-120 days
Arnica (Arnica spp.) – 30-74 days
Artichoke (Cynara cardunculus) – 30-44 days
Asparagus (Asparagus officinalis) – 21-30 days
Aster (Aster spp.) – 30-60 days
Basket of Gold (Alyssum saxatile) – 30-44 days
Bee Balm (Monarda didyma) – 21-30 days
Bellflower (Campanula spp.) – 30-44 days
Black Eyed Susan (Rudbeckia hirta) – 30-60 days
Bluebell (Phacelia spp.) – 60 days
Blueberry (Vaccinium spp.) – 30-120 days
Borage (Borago officinalis) – 30-44 days
Boxwood (Buxus sempervirens) – 30-60 days
Bugbane (Cimicifuga spp.) – 90-120 days
Butterfly Bush (Buddleia davidii) – 21-30 days
Cardinal Flower (Lobelia cardinalis) – 30-60 days
Catmint (Nepeta) – 14-30 days
Catnip (Nepeta cataria) – 14-30 days
Chamomile (Matricaria chamomilla) – 30-74 days
Cherry (Prunus spp.) – 90-120 days
Cohosh, Black (Actaea racemosa) – 60-90 days
Columbine (Aquilegia spp.) – 21-30 days
Comfrey (Symphytum officinale) – 30-60 days
Coneflower, Purple (Echinacea purpurea), Prairie (Ratibida) – 30 days
Cranberry (Vaccinium spp.) – 30-120 days
Delphinium (Delphinium spp.) – 14-30 days
Dianthus (Dianthus spp.) – 14-21 days
Dogwood (Cornus*) – 90-120 days
Edelweiss (Leontopodium alpinum) – 21 days
Elderberry (Sambucus spp.) – 60 days
Fireweed (Chamaenerion angustifolium) – 30-44 days
Forsythia (Forsythia x intermedia) – 30-90 days
Foxglove (Digitalis) – 14-30 days
Gentian (Gentiana**) – 60-90 days
Geranium (Geranium***) – 30-60 days
Ginkgo (Ginkgo biloba) – 30-90 days
Goldenrod (Solidago spp.) – 30-60 days
Goji Berry (Lycium barbarum) – 30-60 days
Good King Henry (Blitum bonus-henricus) – 60-74 days
Grapes (Vitis labrusca) – 90-120 days
Hawthorn (Crataegus) – 120 days
Hollyhock (Alcea rosea) – 90-120 days
Hyssop (Agastache spp.) – 30 days
Iris (Iris spp.) – 60-90 days
Ironweed (Vernonia gigantea) – 60-90 days
Joe Pye Weed (Eupatorium spp.) – 30-60 days
Kiwi Fruit (Actinidia spp.) – 30-60 days
Lady’s Mantle (Alchemilla Mollis) – 21-30 days
Larkspur (Delphinium exaltatum, Delphinium tricorne) – 14-30 days
Lavender (Lavandula spp.) – 7-30 days
Lemon balm (Melissa officinalis) – 7-44 days
Licorice (Helichrysum petiolare) – 14-30 days
Lilac (Syringa vulgaris) – 40-60 days
Lousewort, Canadian / Wood Betony (Pedicularis canadensis) – 30-90 days
Lupine, Wild Blue (Lupinus perennis) – 30-60 days
Magnolia (Magnolia spp.) – 60-90 days
Marshmallow (Althaea officinalis) – 30-44 days
Marsh Marigold (Caltha palustris) – 60-112 days
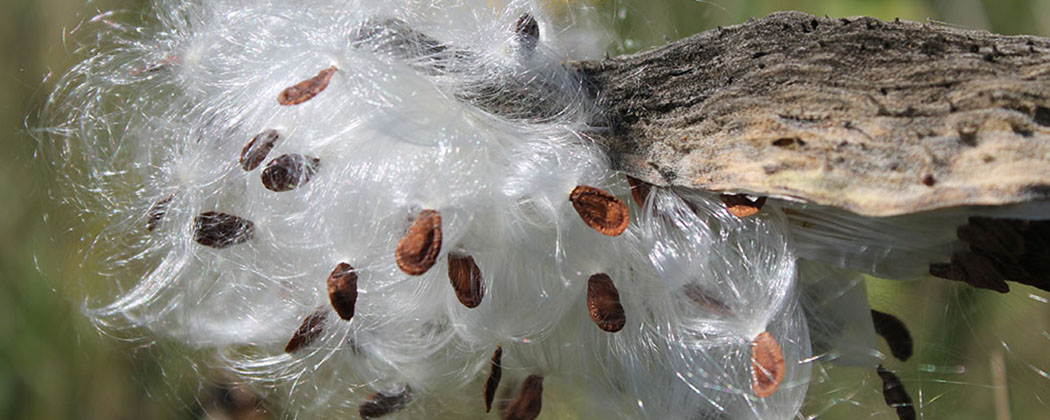
Milkweed (Asclepias spp.) – 30-60 days
Mock Orange (Philadelphus coronarius) – 30-60 days
Mugwort (Artemisia vulgaris) – 14-30 days
Mulberry, Red (Morus rubra) – 90 days
Mullein (Verbascum spp.) – 30 days
Oak, English (Quercus robur) – 90 days
Ox Eye Sunflower (Heliopsis helianthoides) – 30-60 days
Pawpaw (Asimina triloba) – 70 days
Peach (Prunus persica) – 60 days
Pear, European (Pyrus communis) – 60 days
Peony (Paeonia spp.) – 60 days
Persimmon, American (Diospyros virginiana) – 60-120 days
Phlox, Garden (Phlox paniculata) – 60 days
Poppy, Oriental (Papaver orientale) – 21-30 days
Primrose (Oenothera biennis) – 14-42 days
Raspberry (Rubus idaeus, Rubus occidentalis) – 60-120 days
Rhododendron (Rhododendron spp.) – 30-60 days
Rosemary (Rosmarinus officinalis) – 14-44 days
Rose, Wild (Rosa spp.) – 60 days
Sage, White (Salvia apiana) – 14-30 days
Self Heal (Prunella vulgaris) – 30 days
Serviceberry (Amelanchier spp.) – 90-120 days
Shooting Star (Dodecatheon meadia / Primula meadia^) – 30-90 days
Skullcap (Scutellaria lateriflora) – 30 days
St. John’s Wort (Hypericum**^) – 28-42 days
Sunflower, perennial (Helianthus*^^) – 30-60 days
Sweet Flag / Calamus (Acorus calamus) – 30-60 days
Sweet William (Dianthus barbatus) – 30-74 days
Tansy (Tanacetum vulgare) – 14-30 days
Thyme (Thymus genus) – 14-44 days
Trumpet Vine (Campsis radicans) – 30 days
Valerian (Valeriana officinalis) – 14-21 days
Vervain (Verbena hastata, V. urticifolia, V. simplex) – 30-60 days
Wintergreen (Gaultheria procumbens) – 30-72 days
Wisteria (Wisteria spp.) – 30-90 days
Witch Hazel (Hamamelis virginiana) – 60-120 days
Yarrow (Achillea spp.) – 14-30 days
Yucca (Yucca filamentosa) – 30-90 days
Paper Towel Cold Stratification
Spread the seeds in a single layer across double layers of damp paper towel. Wring the paper towel out so that it is not dripping wet.
Make sure each seed has good contact with the damp towel.
Insert the damp paper towel into a Ziploc bag or sealed container.
Label the container with the date and seed variety.
Place seeds in the back or bottom of your refrigerator where it is coldest. Do not place your seeds in the freezer.
In most cases, after 30 days your seeds will be ready to be removed from the refrigerator and potted. If seeds start to sprout in the refrigerator, remove them immediately and pot them in a suitable medium until it’s warm enough to plant them outdoors.
Potting Soil Cold Stratification
Instead of the paper towel, you can also dampen a small amount of your favorite potting mix until it can hold together in a ball. Mix the seeds into the mix (approximately 1 part seed to 3 parts soil) and then place them into a ziploc bag at the back of the refrigerator.
*^Native varieties of St. John’s Wort: Shrubby St. John’s Wort (Hypericum prolificum), Spotted St. John’s Wort (Hypericum punctatum), Pale St. John’s Wort (Hypericum ellipticum), St. Andrew’s Cross (Hypericum hypericoides / crux-andreae), Orangegrass/Pineweed (Hypericum gentianoides). The most prevalent species, (Hypericum perforatum) is not native to Central and Western New York.
In my garden, after a rainfall, you can faintly, yes, hear the breaking of new blooms.
Truman Capote
The optimist
The optimist sees the rose and not its thorns; the pessimist stares at the thorns, oblivious to the rose.
Khalil Gibran
After women
After women, flowers are the most lovely thing God has given the world.
Christian Dior
Love is like wildflowers
Love is like wildflowers; it's often found in the most unlikely places.
Ralph Waldo Emerson
Where flowers bloom
Where flowers bloom so does hope.
Lady Bird Johnson
Let us live like flowers
Let us live like flowers, wild and beautiful and drenched in sun.
Ellen Everett
A flower blossoms
A flower blossoms for its own joy.
Oscar Wilde
The garden suggests
The garden suggests there might be a place where we can meet nature halfway.
Michael Pollan
Coffee. Garden. Coffee.
Coffee. Garden. Coffee. Does a good morning need anything else?
Betsy Caas Garmon
No Gardening Mistakes
There are no gardening mistakes, only experiments.
Janet Kilburn Phillips
The hum of bees
The hum of bees is the voice of the garden.
Elizabeth Lawrence
When the world wearies
When the world wearies and society fails to satisfy, there is always the garden.
Minnie Aumonier
There is nothing that is comparable
There is nothing that is comparable to it, as satisfactory or as thrilling as gathering vegetables one has grown.
Alice B. Toklas
To plant a garden
To plant a garden is to dream of tomorrow.
Audrey Hepburn
Help us to be ever faithful
Help us to be ever faithful gardeners of the spirit, who know that without darkness nothing comes to birth, and without light nothing flowers.
May Sarton
I grow plants for many reasons
I grow plants for many reasons: to please my eye or to please my soul, to challenge the elements or to challenge my patience, for novelty or for nostalgia, but mostly for the joy in seeing them grow.
David Hobson
The Glory of Gardening
The glory of gardening: hands in the dirt, head in the sun, heart with nature. To nurture a garden is to feed not just the body, but the soul.
Alfred Austin
Flowers are the Music
Flowers are the music of the ground from earth's lips spoken without sound.
 The Webster Viridarium