A truly dazzling 300 acre property in Marcellus, NY. Sycamore Hill Gardens is the remarkable creation of Karen and George Hanford’s 35 year efforts to transform a cow farm into a horticultural work of art. With the assistance of only one full-time employee, the Hanford’s built and maintain acres of stunning gardens featuring a diverse collection of trees including a massive hedge maze.
Summer Raine Oakes always visits the coolest places and documents them so well.
With autumn seemingly approaching faster than expected, we decided to head down to Canandaigua for a stroll around Sonnenberg Gardens & Mansion. It’s been a few years since we were last here and its been great to see the changes that have been made. The mansion itself is a marvel, truly a spectacular property. Next time we visit, we’ll try and come earlier in the summer when the gardens are in full bloom.
The Sonnenberg mansion was originally the summer home of Frederick Ferris and Mary Clark Thompson. Frederick was a prominent New York City banker and his wife Mary was the daughter of New York State Governor, Myron Clark and a respected philanthropist who helped fund numerous charitable projects. The mansion was build between 1885 and 1887, while most of the existing gardens were developed between 1899 and 1920.
The Thompson’s had no children, so following Mary’s death in 1923, Sonnenberg was inherited by her nephew, Emory Clark. With the significant cost of running an estate the size of Sonnenberg and the financial realities of the early 1930s, Clark sold the estate to the U.S. government who developed a Veteran’s home on the site, using the mansion as staff residents.
Over time the estate and grounds began to deteriorate significantly. In 1970 a non-profit was established with the goal of purchasing, renovating, and opening the site to the public. Remarkably, by 1973 the deed to Sonnenberg was in the hands of the non-profit, generous local donations were in hand to aid with renovations, and the estate opened to the public for the first time.
Significant challenges were still to come. Most notably, a crooked CEO who stole close to half a million dollars from the organization. The State’s Office of Parks, Recreation and Historic Preservation was brought in to help in 2005.
Over the past 20 years, the organization has found its footing and has continued to restore existing elements of the mansion and gardens and add new features and offerings.
Hard to believe these tiny gems will be heading south shortly. Hadn’t they only just arrived? Still hoping to get a few better shots before that happens. | August 28, 2026
The goldfinch are fond of our volunteer sunflowers | August 20, 2026
The dahlias, zinnas, and cosmos are the stars of the week as the coneflowers have begun to fade. Indoors, we currently have four Monarch chrysalides slowly approaching eclosion. | August 6, 2026
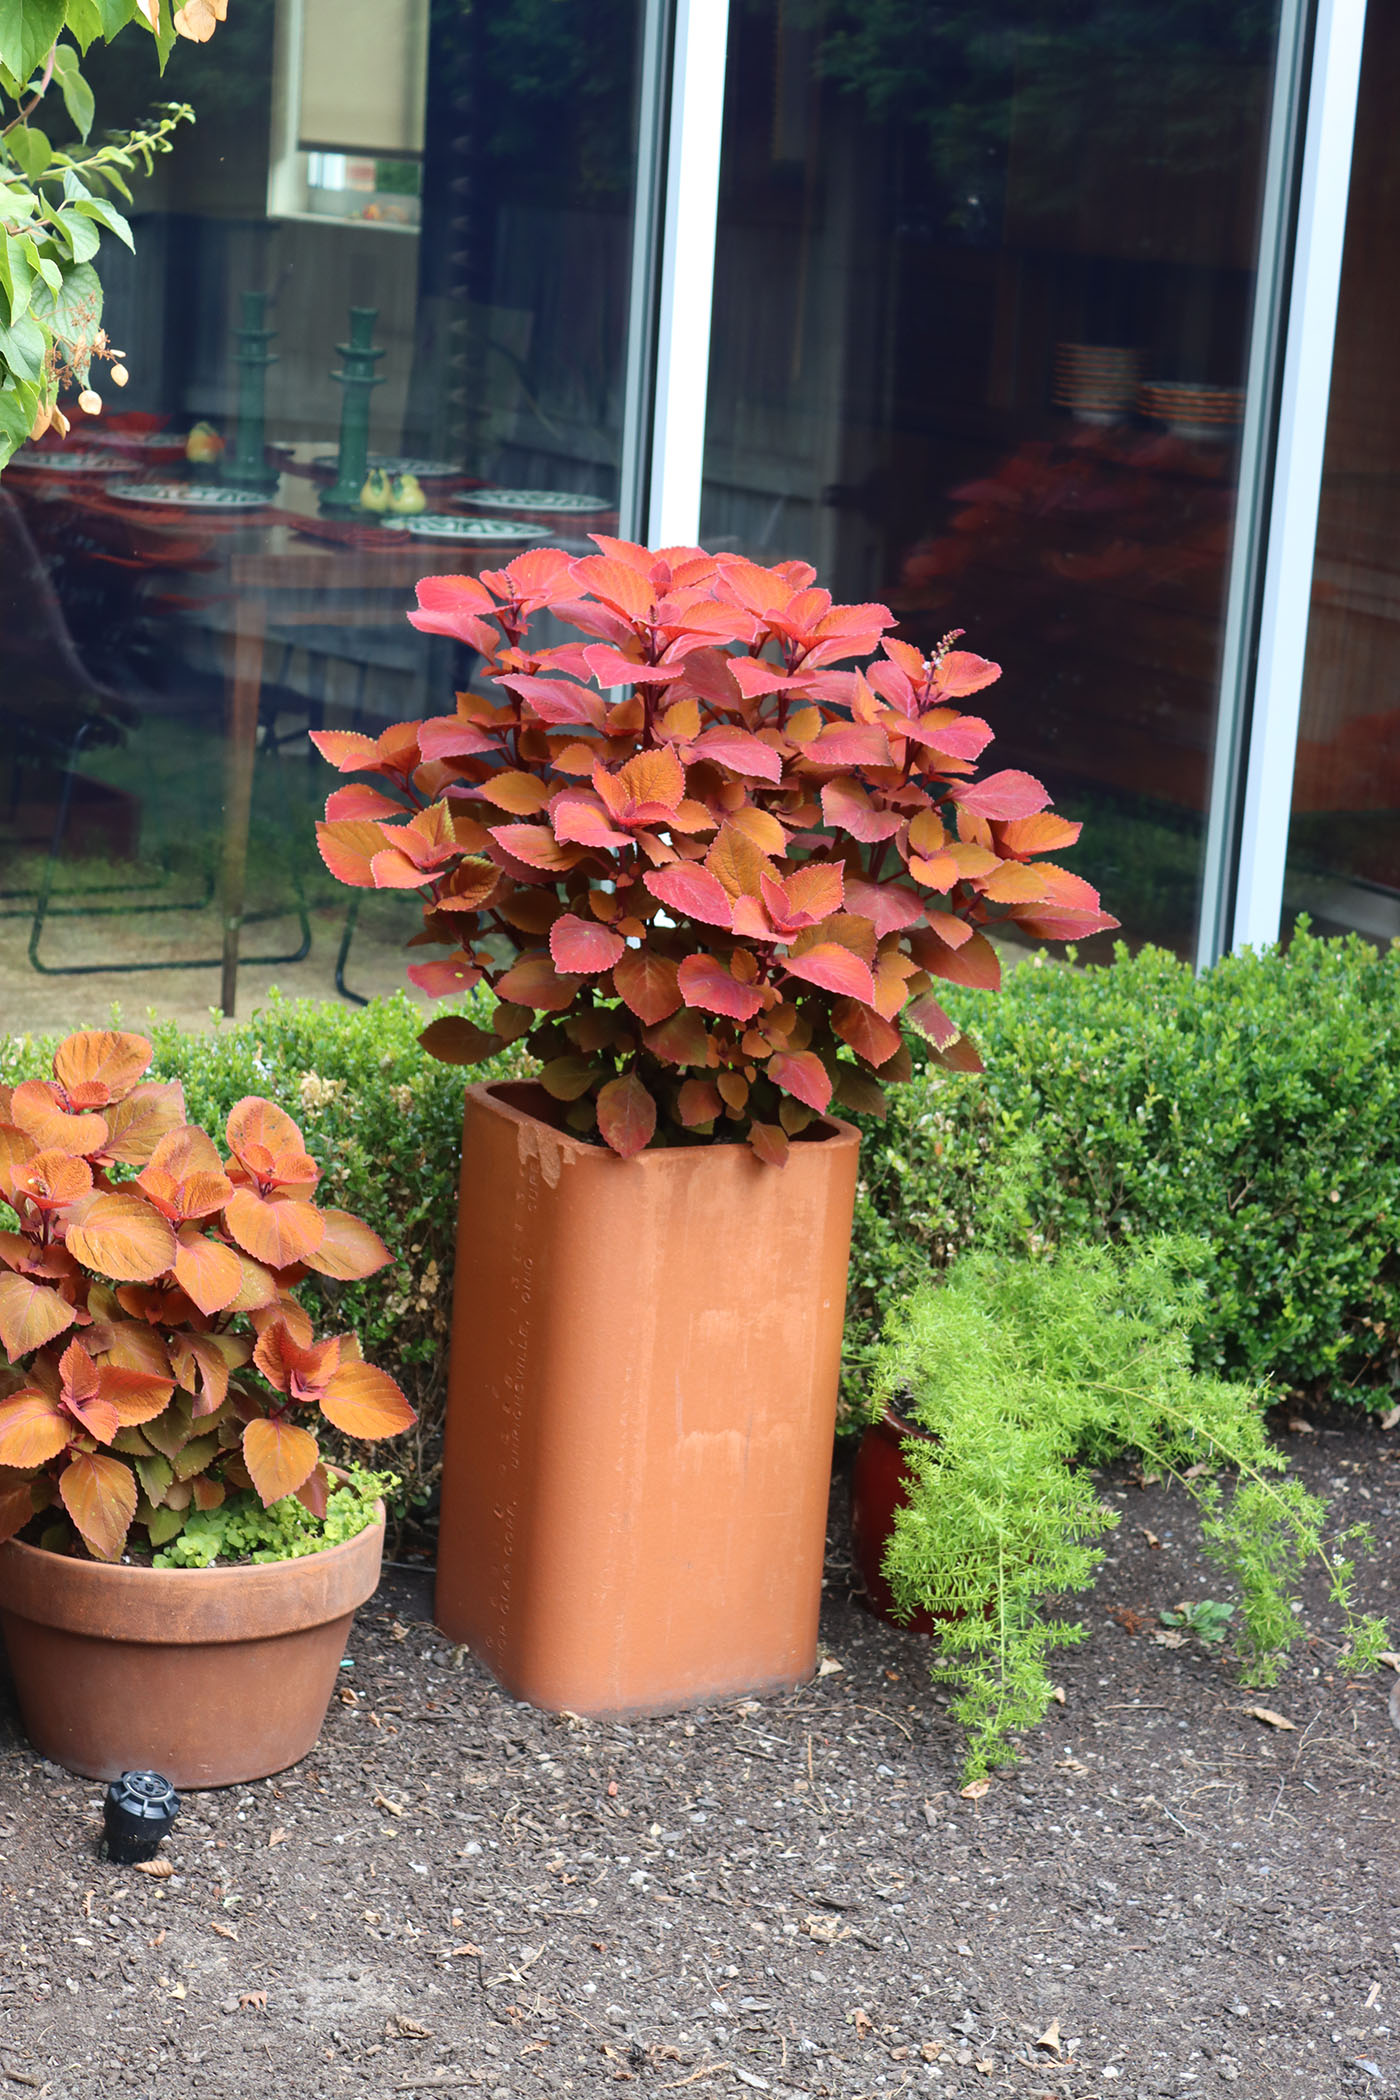
Coleus have been something of the star of this summer’s garden.
Maybe I’ve just been oblivious to the charms of the coleus. Over the years, I’ve seen the occasional coleus here or there, perched upon a shelf amidst a collection of houseplants, or placed as a potted accent along a front walk. This summer however, I’ve seen multiple elaborate coleus displays.
At the recent Buffalo Garden Walk, one homeowner had transformed their driveway into an outdoor living space by placing multiple potted plants, including coleus in 4 foot high clusters that formed the backdrop for walkways and seating areas. (I wish I took more pictures!)
Alone, the colour and patterning of a single coleus plant’s leaves are eye catching. What makes coleus really shine is when drastically different varieties are placed within close proximity to each other. Even with the drastic contrasts in colour between individual plants, their similar tonalities unify the arrangement and create something really striking.
Patience is a virtue they say, but why wait until next spring to start adding a pop of colour to your home! They’re easy to grow and it’s a delight to see the brilliant neon colours emerge.
Growing Coleus from Seed
Timing: If you’re looking to place your coleus outside, start your seeds indoors 8 to 12 weeks before the last expected spring frost. Otherwise, start your seeds anytime.
Soil Prep: Fill a seed tray with a lightweight, pre-moistened seed-starting mix.
Sowing: Press the tiny seeds gently onto the soil surface. Do not cover them, as they require direct light to germinate.
Moisture: Mist the tray lightly with water. Cover it with a clear plastic dome or wrap to lock in humidity. Keep the soil slightly moist, but not too damp or the roots may rot.
Light: Move the sprouts to a bright windowsill or put them under grow lights for 12 to 16 hours daily. The colors of the plants vary greatly depending on how much light they receive. Leaves developed during the winter may be paler in colour than those produced in the summer.
Warmth: Place the tray in a warm spot between 70°F and 75°F (21°C to 24°C).
Sprouting Time: Seeds will sprout in 7 to 14 days. Remove the plastic cover immediately when green specks appear. The initial leaves will be green, but the following set of leaves should give you a hint of the colouration to come.
Transplanting: Move young plants to individual pots when they grow 3 to 4 true leaves and are sturdy enough to handle safely.
Adult Plant Care
Light: Bright, indirect light near an east or west facing window is ideal. Too much direct sun can scorch the leaves, while too little light causes the colors to fade and the plant to become leggy.
Temperature: Keep temperatures between 60°F and 75°F (15°C to 24°C). Protect the plant from cold window drafts and heating vents.
Watering: Water thoroughly whenever the top inch of soil feels dry. Never let the soil dry out completely, or the leaves will quickly wilt.
Humidity: Coleus loves moisture. Group plants together, use a humidifier. Many people place their plants on a tray filled with pebbles and water to boost humidity but it really only has limited impact on the area around the plant.
Fertilizer: To maximize the vibrant foliage of your coleus, use a balanced or high-nitrogen fertilizer while keeping phosphorus levels low. (We use Sea Magic.) Coleus are largely grown for their colourful leaves and not their flowers. High phosphorus can trigger premature flowering and yellowing, making the plant look leggy and spent. For house plants, apply a water-soluble liquid fertilizer diluted to half-strength. Stop feeding entirely during winter dormancy.
Rotate the pot: Turn the plant a quarter-turn every week to ensure even light exposure and balanced growth.
Pinch the tips: Routinely pinch off the growing tips to prevent the plant from becoming tall and spindly. While most coleus plants need to be trimmed in order to develop a pleasant shape, the Kong variety generally prefers to be left alone.
Flowering: To help maintain the plants colour and shape, remove any flower buds that begin to form.
Outdoors: If you place your coleus plants outdoors, they will need to be moved to a protected area when there is a chance of frost. It is not recommended to bring the plants back indoors as they generally don’t transition well and as insects may have made homes in the plants soil. An alternative is to take a few cuttings from your outdoor plant and root them in a small container of soil indoors.
As it was a beautiful day out, we took a drive down to Churchville to visit the lovely folks at Bergen Water Gardens. What’s not to like about a place that specializes in orchids, carnivorous plants, waterlilies, and lotus?
Overall, I’ve had good experiences purchasing exotic plants online, but it’s truly marvelous to be able to walk in to a local nursury, look around, and talk to a friendly and knowledgeable staff like at Bergen Water Gardens.
Their Victoria, giant platter waterlily, recently reached 40 inches in diameter, which is pretty impressive given this summer’s cooler temperatures and Western, NY’s short growing season.
Our hopes are to construct a water garden of our own next summer. Nothing too grand, but a place to display a few lotuses. We’ll be back at Bergen Water Gardens soon!
My eye couldn’t help but notice a lovely orchid that just had to come home with us. The flowers are so amazingly fragrant.
With over 300 gardens to explore, the biggest question was, how can you see them all? We did our best, but we didn’t manage to visit every garden on this years Buffalo Garden Walk. What we did see was a number of truly inspiring gardens. Many hidden gems contained within the backyards of local homes, usually unseen but to a select few close friends. We felt the genuine generosity of the many home owners who kindly shared their gardens, their vision, and their horticultural passions with all who stopped by.
The weather was fabulous all weekend. We were fortunate to became acquainted with a number of lovely Buffalo neighborhoods we had never seen before. We ate at a charming bakery cafe and took in a Buffalo Bisons game at Sahlen Field (As luck would have it, the Bisons were playing the Rochester Red Wings.)
On a recent visit to Village Gate in Rochester, we couldn’t resist stepping through the inviting doors of Banner, Wing, & Keel. The shop carries a pleasing selection of small houseplants and cuttings that they call “Pixie Plants”. I was taken by an adorable Leopard Lily and had to bring it home.
You may know the Leopard Lily (Ledebouria socialis) as silver squill or wood hyacinth, a native to the savannas of South Africa.
Ledebouria socialis, commonly known as silver squill, leopard lily, or wood hyacinth, is a popular, easy-to-grow bulbous perennial houseplant prized for its striking foliage.
It grows 6–10 inches tall and wide, forming clumps of teardrop shaped bulbs. The leaves are long, slender, silvery-green with dark green “leopard” spots on top and often purple underneath. In spring, it produces 10 inch vertical stalks with small, greenish-white to pinkish bell-shaped flowers.
The leopard lily is a geophyte, whose bulbs are somewhat exposed and can store moisture for times of drought. While an evergreen, it does have a winter rest period.
The species name socialis refers to its tendency to form dense colonies, while the genus Ledebouria honors the botanist Carl Friedrich von Ledebour.
Cultivation and Care
It is considered a low-maintenance, beginner-friendly houseplant that thrives with minimal care.
Light: Bright indirect light or partial shade (3–4+ hours of bright light daily). Avoid intense direct sun to prevent scorching, but too little light can cause leggy growth and faded colors.
Soil: Well-draining succulent or cactus mix (or houseplant mix amended with pumice/perlite). Neutral pH preferred. Plant bulbs in shallow, wide pots (pan pots), keeping the top half of the bulbs above the soil surface.
Watering: Treat like a succulent. Water moderately during the growing season (spring/summer), letting the top inch or so of soil dry out between waterings. Reduce significantly in winter for its rest period. Overwatering leads to rot.
Temperature: Prefers 60°F+ (normal room temps); hardy in USDA zones 10a–11. Protect from frost.
Fertilizer: Light feeding every 2–3 months during growth with a balanced or cactus fertilizer.
Propagation: Easily propagated by separating the small bulbils (offsets) that form around the main bulbs, best done during repotting in spring. Seeds are possible but less reliable.
Toxicity: All parts of the plant are toxic to humans and pets.
Banner, Wing, & Keel is located at 274 N. Goodman Street in Village Gate. They are open Thursdays – Saturdays 11am – 6pm and Sundays 12pm-4pm.
While in theory a grand idea, in practice, purchasing live ladybugs online or from a local garden stores is largely a waste of your money.
After an autumn of hearty eating, ladybugs go off to slumber with a full belly often many miles from the flower filled gardens they called home. They typically hibernate in large communal groups of many millions of ladybugs.
In most cases, the ladybugs available for purchase were captured during this hibernation period. Large numbers of hibernating ladybugs are vacuumed up and then refrigerated until distributed for sale.
They awake in unfamiliar surroundings, not hungry because of their winter reserves, and fly off in search of new flower filled gardens to call home.
Within 48 hours, less than 5% of the ladybugs released into your garden are still there.
It’s a noble idea. Nobody hates pesticides more than us.
Creating an environment where ladybugs populate your garden naturally is a better approach.
As well as eating aphids and spider mites, ladybugs also feed on plant nectar and pollen. Growing plants in the apiaceae family like dill, coriander, fennel, and the daisy family like sunflowers and yarrow will invite ladybugs to your yard. Visit our “Attracting Ladybugs” page to learn more.
Nicole Burke of gardenary.com sharing why buying ladybugs doesn’t work.
Further reading:
Tom Kalb of North Dakota State University’s Extension has a great article on what happens when you release ladybugs onto your property.
Inaturalist’s awesome database of Ladybug species across the United States.
Can I compost this? Citrus? Shrimp shells? Corks? Stink bugs? Whether or not to put these unusual items on your compost heap.
Can I compost wine corks?
Reveal/Hide Answer
Yes! You can compost wine corks—but only if they’re natural cork (from the bark of cork oak trees). These are 100% biodegradable, carbon-rich "browns" that add great long-term structure and nutrients to your pile as they slowly break down.
Natural vs. Synthetic
Natural corks — Look and feel like real wood/bark: lightweight, porous, crumbly when cut, with a natural grain. Slice one open—if it’s uniform light tan/brown throughout and smells woody, it’s natural and compostable. Synthetic corks — Made of plastic, foam, or silicone (common in cheaper wines): smooth, uniform color (often bright white/yellow), feel rubbery/plasticky, and don’t crumble. Do not compost these—they won’t break down and could release microplastics. Trash them or upcycle (crafts, bulletin boards, etc.).
Composting Best Practices
Prep them — Cork is tough and naturally water-resistant (that’s why it seals bottles!), so whole corks can take months to years to fully decompose in a backyard pile.
To speed things up: Chop, slice, or grind them.
Bury pieces in the center of the pile and mix with other browns (leaves, shredded paper) and greens (kitchen scraps) for balance. This prevents them from just sitting there.
I don’t compost corks because they’re useful for other things like backdrops for shelves.
Cheers! 🍷
Can I compost teabags?
Reveal/Hide Answer
Possibly not.
As of March 2026, while a number of prominent tea manufactures have moved away from non-compostable tea-bags, some have moved to polylactic-acic (PLA) bioplastics, which can be composted but require the high heat of an industrial facility and won’t break down in most home composters piles.
Polylactic acid (PLA) is a biodegradable, bio-based thermoplastic derived from materials like corn starch, sugarcane, or tapioca.
Beyond the compostability of the teabags there is also the concern that bioplastic teabags potentially release nanoplastic particles into your cup while the tea is steeping and into the ground when breaking down like traditional polypropylene plastics do.
Not Compostable Most surprisingly, the company most American’s would associate with all natural teas, Celestial Seasonings uses plastic in their teabags (food-grade polypropylene plastic fibers derived from fossil fuels). Celestial Seasonings Tea Lipton Tea Tetley Tea
Can I compost stink bugs?
Reveal/Hide Answer
Yes! Stink bugs are perfectly fine to add to a compost heap in small to moderate quantities. They’re 100% natural organic material—mostly chitin exoskeleton and proteins—so they break down just like any other dead insect, contributing nitrogen and becoming part of the nutrient cycle.
Insects are a normal part of healthy compost: Decomposers (bacteria, fungi, worms, etc.) routinely process dead bugs in soil and piles. They add minor nutrients (like nitrogen) and don’t introduce pathogens harmful to compost or plants when dead.
Bury them in the pile: Toss dead ones into the center or mix them under a layer of browns (leaves, shredded paper, etc.) to speed breakdown and prevent any temporary odor or attraction of flies/scavengers.
Keep quantities small: A handful here and there is no problem. If you’re vacuuming up dozens during an invasion, add them gradually rather than dumping a big batch at once—too many at once could create a temporary “hot spot” or slight stink as they break down (though nothing like live ones spraying).
Method: If they died naturally, or you used soap/water or vacuumed them up, there are no residue issues. Avoid composting bugs killed with pesticides or chemical sprays, as those could harm beneficial compost organisms (e.g., worms or microbes).
Can I compost a Yankee cap?
Reveal/Hide Answer
No! Alas, as a Blue Jays fan, I’d love to compost Yankee caps but like most modern baseball caps, including the Official New Era Yankees caps, they are usually made from:
Polyester (often the primary fabric, especially in performance or modern versions—sometimes 100% polyester or high blends).
Cotton twill (in some relaxed or “Clean Up” styles from brands like ’47, often have 100% cotton or high cotton content still have synthetic components hidden in seams, linings, or the brim reinforcement).
Cotton-polyester blends (e.g., 40% cotton / 60% polyester in some models).
with other elements like: Plastic snaps/buttons (on adjustable backs), synthetic threading, embroidered logos (with plastic-like stabilizers or threads), foam/viscose in the bill (stiffener), and sometimes metal eyelets or tags.
Why It Won’t Compost Well:
Polyester and synthetics are basically plastic—they don’t biodegrade in a home compost pile (or even most industrial ones). They can persist for hundreds of years, potentially releasing microplastics into your finished compost/soil.
Non-natural additives (dyes, treatments, glues, or stiffeners) may not break down and could introduce unwanted chemicals.
Even if mostly cotton, the synthetic bits contaminate the pile—best practice is “when in doubt, leave it out” for clothing/textiles in home composting.
Pure 100% natural-fiber items (like undyed cotton rags with no blends/synthetics) can go in compost, but that’s rare for mass-produced hats.
Can I compost Citrus fruit?
Reveal/Hide Answer
Yes! You can indead compost citrus fruit (oranges, lemons, limes, grapefruits, etc.—including peels, whole fruit, or scraps) in a home compost heap. It’s a common myth that you shouldn’t, but that’s largely debunked by gardeners, composting experts, and extension services.
The old concerns were:
Too acidic — Citrus is acidic when fresh, but in a balanced compost pile, the pH neutralizes quickly as microbes break it down. It won’t make your finished compost overly acidic unless citrus is the overwhelming majority of what you’re adding (which is unlikely in a normal kitchen/yard setup).
Harmful to worms — The oils (like limonene in peels) can irritate composting worms (especially red wigglers in vermicompost bins) if added in huge amounts, making them avoid the area or slow down. But in a regular outdoor pile, earthworms can just move away temporarily if needed, and the pile still decomposes fine. Worms usually join later in the process anyway, after initial breakdown.
Slow to break down — Peels are tough and waxy, so they take longer than softer scraps (months instead of weeks), but they do eventually decompose fully.
Best practices:
Chop or shred peels into smaller pieces—this speeds things up a lot.
Mix well — Bury citrus scraps in the center of the pile under layers of “browns” (leaves, shredded paper, cardboard) to balance the “green” nitrogen from the fruit and prevent any temporary smell or mold.
Moderate amounts — A few peels or a couple of fruits here and there? Totally fine. If you’re juicing a ton, add them gradually and turn the pile to aerate and heat it up.
Hot vs. cold composting — In a hot, active pile (turned regularly), citrus breaks down faster. In a slower cold pile (common in colder NY winters), it still works but takes longer—freeze-thaw cycles actually help by breaking down cell walls over time.
Pest deterrent bonus — The strong citrus smell can actually help repel some rodents or flies from raiding the pile.
If you’re using a worm bin (vermicomposting) indoors, though, go easy on citrus—small amounts only, or skip it to keep the worms happy.
Can I compost Shrimp Shells?
Reveal/Hide Answer
Yes!
Not sure I would add them to my compost heap, but yes, you can compost shrimp shells (including heads, tails, and bodies) in a backyard compost heap—they’re a great organic addition that breaks down over time and provides valuable nutrients like nitrogen, calcium, and chitin (which can benefit soil health and even help suppress some plant pests/pathogens as it decomposes).
Shrimp shells are considered a "green" material (nitrogen-rich), similar to kitchen scraps or grass clippings, and they fit well into balanced compost piles. They add nitrogen for microbial activity and calcium/chitin that enriches finished compost (chitin promotes beneficial fungi and can improve soil structure).
Potential Downsides
The main concerns are temporary odor (fishy smell during initial breakdown) and attracting pests (flies, rodents, raccoons, or neighborhood animals).
To minimize problems Bury them deep — Dig a hole or trench in the center of your pile, add the shells, mix with existing material, and cover with a thick layer of "browns" (leaves, shredded paper, cardboard, straw) to absorb moisture/odors and block access. Crush or chop them — Break shells into smaller pieces (use a hammer, rolling pin in a bag, or food processor/blender for dried ones) to speed decomposition (whole shells can take months to years). Pre-treat if possible — Rinse off any sauces/butter first. Some folks boil shells briefly (20–30 minutes) to reduce smell and kill bacteria, then dry them (sun-dry or oven) until crisp before adding—this makes them less attractive to pests and easier to crush. Add in moderation — A handful or two at a time is ideal; avoid dumping large quantities all at once, as that can create a smelly, anaerobic spot. Balance the pile — Mix with plenty of carbon-rich browns and turn/aerate regularly to keep it hot and active (heat helps break down faster and reduces odors). Pest-proof your setup — If rodents are an issue, use a enclosed bin/tumbler with a secure lid, or bury shells extra deep (12+ inches). Avoid leaving exposed scraps on top.
Can I compost Walnuts?
Reveal/Hide Answer
Well…technically Yes, A number of state extensions and other experts say that walnuts, even black walnut tree materials can be composted as long as the heap reaches a high internal temperature and the material is in the heap for at least six months.
Walnut trees (especially Black Walnut trees) contain a chemical called juglone that can adversely affect a number of garden plants including tomatoes, peppers, eggplants, rhubarb, columbine and others.
Butternut, pecan, hickory, and English walnut trees also contain the compound but in smaller amounts.
Our recommendation would be to use caution. There are plenty of other materials to compost, so why fiddle with walnuts?
Can I compost a Curling stone?
Reveal/Hide Answer
ah…No!
Did you really have to click to reveal this? It’s made of flippin’ granite!
No, you cannot compost a curling stone because it is made of granite, typically sourced from Ailsa Craig in Scotland., not organic matter. Compost is for material that breaks down, and while the rock won’t harm your compost pile, it will not decompose, even over several thousand years. As a rock, it is inorganic material and will remain in your compost pile unchanged.
Can I compost Marmite?
Reveal/Hide Answer
Yes, You can compost Marmite — in small amounts, it should break down just fine in a home compost pile.
Marmite is basically a concentrated yeast extract (from brewer’s yeast), mixed with salt, some vegetable extracts, and spices. Yeast and its byproducts are organic and fully biodegradable:
Plain yeast (or spent brewer’s yeast) is routinely added to compost piles or used as a compost activator/fertilizer by homebrewers and gardeners — it provides nitrogen and feeds the microbes that do the decomposing work. The main "issue" is the high salt content. Too much salt at once can temporarily harm soil microbes or make the compost a bit saline if you add large quantities.
Suggested Use:
Scrape small leftover amounts (e.g., residue from a jar, a spoonful or two into your compost — it will disappear quickly.
Mix it in well with other materials (greens like veggie scraps + browns like leaves/cardboard) to dilute the salt.
Avoid dumping a whole jar or large volumes at once — that much salt could slow things down or attract unwanted attention from animals (though Marmite’s strong smell might actually deter some pests rather than attract them).
If your compost is a bokashi system or worm bin (vermicomposting), go very light or skip it — worms can be sensitive to high salt.
People even use tiny bits of yeast extract spreads like Marmite or Vegemite diluted in water as a quick microbial boost for compost teas or as a plant fertilizer in some gardening circles.
A bit of Marmite in the compost? Totally fine and even mildly beneficial. A whole jar? Would be a waste of lovely marmite! It would be better to avoid or dilute heavily first.
It doesn’t have to be St. Patrick’s Day to enjoy the charm of the shamrock plant.
Shamrock plants, commonly sold as “shamrocks” (especially around St. Patrick’s Day), are not true shamrocks or clovers. They belong to the Oxalis genus (of the wood sorrel family, Oxalidaceae), and are often referred to as false shamrocks, purple shamrocks, or simply oxalis.
Legend holds that St. Patrick used the three-leafed clover to explain the Holy Trinity—Father, Son, and Holy Spirit—to the Irish people in the 4th century. The word “shamrock” derives from the Irish words seamair óg or young clover.
Clovers ( or trefoils), are plants of the genus Trifolium (from Latin tres ‘three’ and folium ‘leaf’).
There is some dispute between historians as to which variety of clover is the true shamrock.
Whether the true shamrock is Trifolium dubium (lesser/yellow clover, seamair bhuí), Trifolium repens (white clover, seamair bhán) or Trifolium pratense (red clover, seamair dhearg), we’ll leave it to the Irish historians to battle it out.
All three varieties of clover would make really lousy houseplants…hence the popularity of oxalis!
Oxalis come in numerous forms and from multiple parts of the world, but the ones promoted around St. Patrick’s Day have clover-like (trifoliate) leaves. While there are oxalis varieties native to Ireland, many of the varieties sold in home improvement stores and grocery stores around St. Patrick’s Day originate from South America or Africa.
St. Patrick’s Day Shamrock plant varieties:
Oxalis triangularis (purple shamrock or false shamrock) — with deep purple to burgundy leaves, often with a darker center triangle pattern.
Oxalis regnellii (green shamrock) — Native of South America with bright green leaves.
Oxalis tetraphylla (four-leaf sorrel or iron cross) — green with a burgundy colored center
Other popular oxalis varieties:
Oxalis adenophylla (silver shamrock) — Native to Argentina and Chile. Has light pink flowers with heavily divided leaflets. Cold hardy to zone 4.
Oxalis vulcanicola (molten lava, copper glow) — Native of Mexico. Has brightly coloured leaves and flowers.
Oxalis oregana (redwood sorrel) — clove like leaves with pink veined white flowers.
Oxalis griffithii — Native of Asia. Cold hardy to zone 4. Spreads via rhizomes, not bulbs.
Oxalis acetosella — Native to Europe. Green with white flowers. Spreads via rhizomes, not bulbs.
General characteristics:
Leaves are trifoliate (three heart-shaped leaflets) that fold up at night or in low light (a movement called nyctinasty).
They produce delicate, small flowers — usually white, pink, or pale purple — that bloom for long periods.
They grow in clumps of small bulbs known as corms,
They’re perennials and are usually grown indoors as houseplants, but can be grown outdoors in warmer climates (USDA zones 8a–11, in light shade).
Many people love them for their vibrant color (especially the purple varieties, which add contrast to green-heavy plant collections) and the way leaves “respond” to light and time of day. They are also easy to grow low-maintenance plants.
Basic care tips (as houseplants):
Light — Bright, indirect light is ideal; some gentle morning sun works, but avoid harsh afternoon direct sun to prevent scorching.
Water — Keep soil evenly moist but not soggy — let the top dry slightly between waterings. They don’t like their feet too wet as they will begin to rot.
Temperature — Prefers cooler conditions (around 60–75°F / 15–24°C); hot temperatures can trigger dormancy.
Soil — Well-draining potting mix (with perlite or sand for aeration).
Fertilizer — Light feeding with balanced houseplant fertilizer during active growth (spring/fall); skip in dormancy.
Dormancy — They typically go dormant for a brief period during the summer. Their leaves will die back and they may even look quite dead. Don’t despair and throw them away! Reduce watering, and possibly move them to a cooler spot out of the sun. Once they’ve rested for a month or so, they’ll surprise you and pop right back.
Toxicity — They’re toxic if ingested in large quantities (they contain oxalic acid, like rhubarb leaves), so it’s best to keep them out of reach of pets and young children.
They’re easy to propagate by dividing the bulbs and can live for years with proper rest periods.
Overall, shamrock Oxalis plants are charming, eye-catching additions to indoor spaces — especially the purple ones that look almost like butterflies! If you’re thinking of getting one, they’re widely available as potted plants or bulbs.
Oxalis plants (like the popular shamrock or purple shamrock, Oxalis triangularis, and green shamrock, Oxalis regnellii) are among the easier houseplants to propagate. They primarily grow from small bulb-like structures called corms or tubers, which multiply naturally over time. This makes dividing them pretty straight forward.
Division of Bulbs/Corms
When to do it — Wait until the plant goes dormant (foliage fully dies back). This is usually the easiest time, as the bulbs are resting and multiply readily.
Gently remove the entire plant from its pot.
Shake off excess soil to expose the small, clustered bulbs (they look like tiny onions or garlic cloves, often brown and papery).
Separate the bulbs by hand — they usually pull apart easily. If clustered tightly, use clean fingers or a small tool to tease them apart without damaging them.
Discard any mushy, rotten, or shriveled bulbs.
Plant the separated bulbs in fresh, well-draining potting mix (add perlite for extra drainage). Bury them about 1–2 inches deep, pointy end up if visible.
Water lightly and place in bright, indirect light. New growth (leaves) should emerge in a few weeks to a couple of months.
Their bulbs multiply quickly (a single plant can produce many offsets in a season), so you can get several new plants from one mature clump.
In my garden, after a rainfall, you can faintly, yes, hear the breaking of new blooms.
Truman Capote
The optimist
The optimist sees the rose and not its thorns; the pessimist stares at the thorns, oblivious to the rose.
Khalil Gibran
After women
After women, flowers are the most lovely thing God has given the world.
Christian Dior
Love is like wildflowers
Love is like wildflowers; it's often found in the most unlikely places.
Ralph Waldo Emerson
Where flowers bloom
Where flowers bloom so does hope.
Lady Bird Johnson
Let us live like flowers
Let us live like flowers, wild and beautiful and drenched in sun.
Ellen Everett
A flower blossoms
A flower blossoms for its own joy.
Oscar Wilde
The garden suggests
The garden suggests there might be a place where we can meet nature halfway.
Michael Pollan
Coffee. Garden. Coffee.
Coffee. Garden. Coffee. Does a good morning need anything else?
Betsy Caas Garmon
No Gardening Mistakes
There are no gardening mistakes, only experiments.
Janet Kilburn Phillips
The hum of bees
The hum of bees is the voice of the garden.
Elizabeth Lawrence
When the world wearies
When the world wearies and society fails to satisfy, there is always the garden.
Minnie Aumonier
There is nothing that is comparable
There is nothing that is comparable to it, as satisfactory or as thrilling as gathering vegetables one has grown.
Alice B. Toklas
To plant a garden
To plant a garden is to dream of tomorrow.
Audrey Hepburn
Help us to be ever faithful
Help us to be ever faithful gardeners of the spirit, who know that without darkness nothing comes to birth, and without light nothing flowers.
May Sarton
I grow plants for many reasons
I grow plants for many reasons: to please my eye or to please my soul, to challenge the elements or to challenge my patience, for novelty or for nostalgia, but mostly for the joy in seeing them grow.
David Hobson
The Glory of Gardening
The glory of gardening: hands in the dirt, head in the sun, heart with nature. To nurture a garden is to feed not just the body, but the soul.
Alfred Austin
Flowers are the Music
Flowers are the music of the ground from earth's lips spoken without sound.
 The Webster Viridarium